REVIEW · POKHARA
Pokhara : Hiking to Sarangkot from Lakeside
Book on Viator →Operated by Couch Adventure Nepal (CAN) · Bookable on Viator
Sarangkot is the quickest way to feel Pokhara’s mountain drama. This easy, short hike links the Lakeside area to a viewpoint above the valley, with forests, village paths, and lake views along the way. You get hotel pickup (from the Lakeside area) and an English-speaking guide, which matters because the trail is more than a straight line.
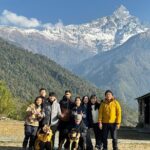
I really like that the day is built around the viewpoint moment: once you reach Sarangkot, you get wide 180-degree Annapurna-range views and time to slow down. Another big plus is how the route mixes nature with real local scenery—small forests and rural villages are part of the hike, not just background. One thing to consider: it’s a short outing, so you’ll want comfortable shoes and a bit of steady stamina, and if you’re staying outside the Lakeside zone, pickup may be limited to hotels within walking distance.
In This Review
- Key things to know before you go
- The Lakeside-to-Sarangkot Route in Plain English
- The 180-Degree Sarangkot Moment (and why it’s the point)
- What You Walk Through: Forests, Villages, and Lake-Back Glimpses
- Descent Back to North Lakeside: The Walk That Finishes the Day
- Guides and Pace: Why a Good Match Makes This Feel Easy
- Price and Value: Is $55 Actually Fair Here?
- Timing Tips: 8am Start, Best Light, and How to Prepare
- Entrance Fee Included: Small Detail, Big Relief
- Weather Reality Check: When the Mountains Play Hide-and-Seek
- Who This Hike Fits Best
- Should You Book This Lakeside to Sarangkot Hike?
- FAQ
- How long is the hike from Lakeside to Sarangkot?
- What time does the experience start?
- What’s included in the $55 price?
- What’s not included?
- Is it a private tour?
- Do I need to buy tickets for Sarangkot?
Key things to know before you go
- Pickup from Lakeside keeps the start simple, and the walk begins right from the area where most people stay
- Sarangkot viewpoint time is the main event, with very wide Annapurna views
- Forest + village sections mean you’re not just climbing for a photo and quitting
- Guides like Prakash and Krishna show up in real-world feedback for friendly, helpful guidance
- Short 3–4 hour format makes it an easy fit into a Pokhara itinerary
- Entrance fee and water are included, but meals aren’t—plan to buy as you go
The Lakeside-to-Sarangkot Route in Plain English
Think of this hike as a “morning reset” that trades city noise for a viewpoint payoff. You start from the Lakeside area, get picked up around 8am, and then walk toward Sarangkot at a comfortable hiking pace. The route begins with a bit of walking to cross through the lakeside city area, then transitions into an uphill climb through small forests and rural villages.
The whole experience is designed to feel doable. It’s not a multi-day trek, and the time on trail is short enough that most people can manage it with basic fitness. The route also isn’t just uphill. You earn the view, then you come back down and finish with a lakeside-area return walk along the lakeside road.
Practical tip: this is the kind of outing where you should treat your first 20 minutes like warm-up time. The early sections can feel slightly busier because you’re moving through the city edges before the trail quiets down.
You can also read our reviews of more hiking tours in Pokhara
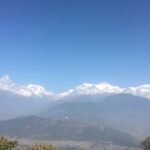
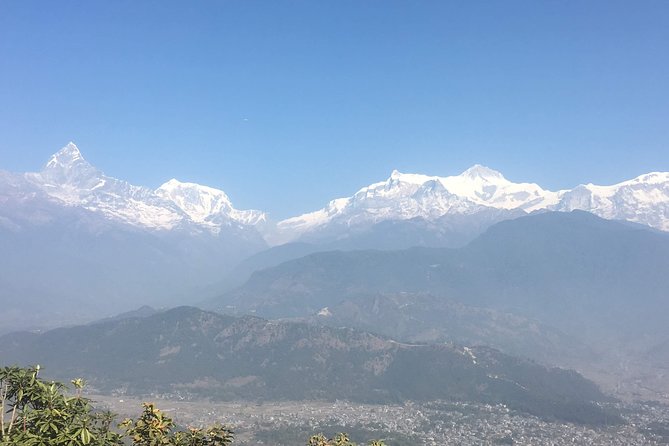
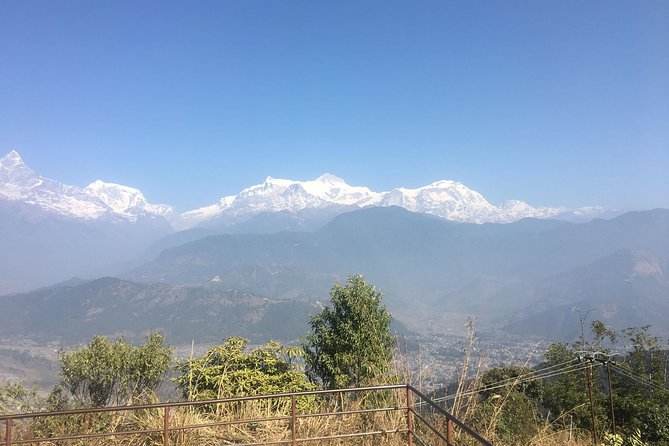
The 180-Degree Sarangkot Moment (and why it’s the point)
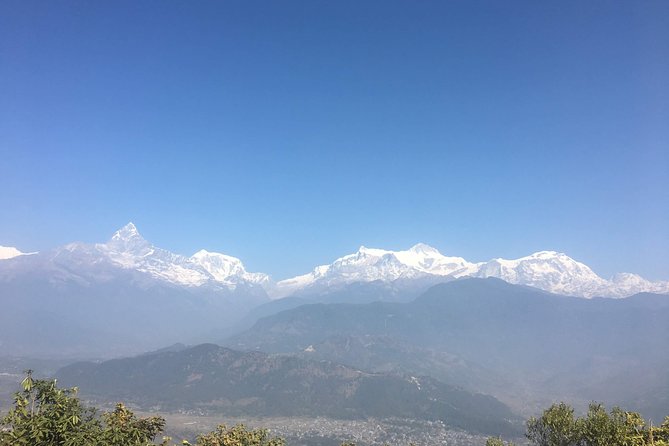
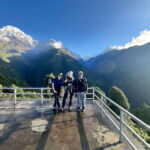
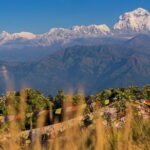
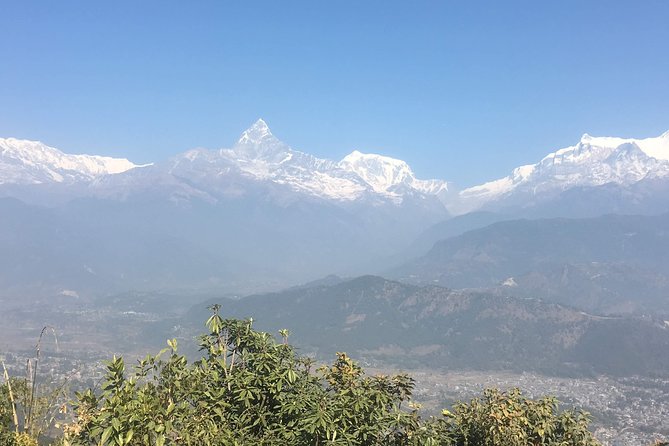
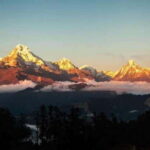
Sarangkot is famous for a reason: it’s a high vantage over the Pokhara valley. In this hike, your main reward arrives after the ascent, when you reach the Sarangkot viewpoint. This is where the day shifts gears from walking to soaking in the Annapurna mountain range panorama with a claimed 180-degree view.
You’ll spend time up top, which is important. Some hikes rush you. This one builds in a pause so you can:
- scan the mountain lines,
- check how far the visibility stretches that day,
- and take photos without feeling like you’re sprinting to the next stop.
A small but helpful detail: the included entrance fee means you don’t have to hunt for the right place to pay before your view time. Also, the tour format keeps you from wandering around on your own when you’re tired or unsure where to go at the viewpoint.
One thing to remember: mountains can be moody. If clouds roll in, your “wow” factor might shrink. Still, even partial views usually beat a plain morning.
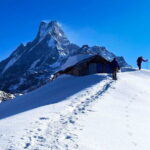
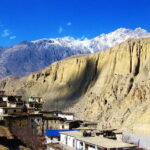
What You Walk Through: Forests, Villages, and Lake-Back Glimpses
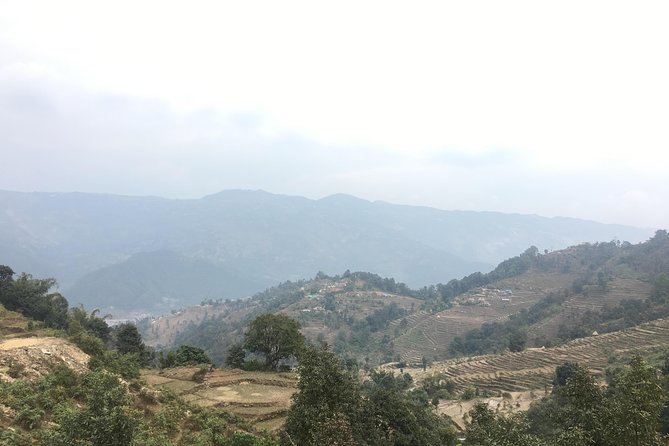
The trail has a nice rhythm. After you move beyond the lakeside city area, you start ascending through small forests and village paths. That mix is part of the value here, because you’re not only dealing with steepness—you’re also seeing how people live on the hillside.
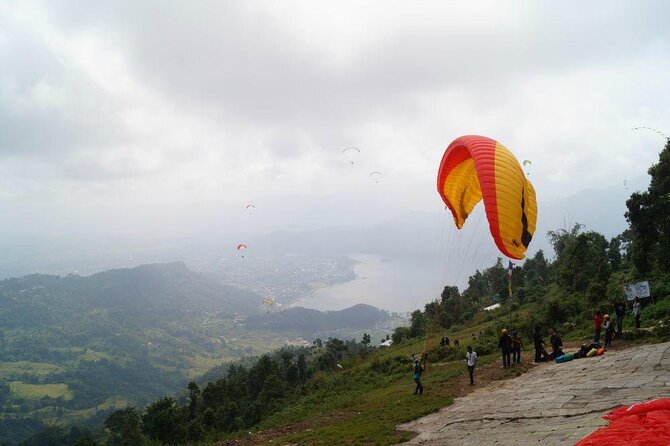
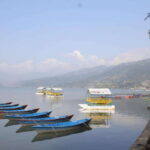
You also get lake views behind you during the climb. That matters because it breaks up the steady uphill effort. Instead of staring at the ground, you periodically look back and realize you’re going higher above the valley, with Pokhara’s lake area dropping away below.
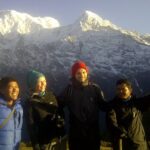
Based on feedback from people who used Couch Adventure Nepal, the guides tend to make this portion feel more meaningful. Names that came up include Prakash and Krishna, and the common thread is that the guidance isn’t just directions—it’s also about understanding what you’re seeing and navigating the trail confidently.
Practical consideration: village and forest trails can be a bit uneven. Wear shoes with grip. Even if the hike is short, you don’t want to slip on a damp patch and waste your energy on damage control.
Descent Back to North Lakeside: The Walk That Finishes the Day
When you’re done at Sarangkot, you’ll descend back toward the north Lakeside area. This is a relief zone for most people. Going down takes patience, but it usually feels easier than climbing.
The tour then continues with a return along the lakeside road back to Pokhara, and you’re dropped off back at your hotel. The return walk also keeps the day from feeling abrupt—you get a gradual finish, not an instant cut-off right after the viewpoint.
Even though the uphill is the headline, I like that the descent route doesn’t just toss you into the city. You still get a proper “close out” portion, so the morning doesn’t feel like a single sprint from point A to point B.
Guides and Pace: Why a Good Match Makes This Feel Easy
This is a short hike, but it still benefits from a real guide. You’re dealing with a mix of hillside walking, village sections, and a viewpoint area where it’s easy to lose track if you’re following your own sense of direction.
The tour includes an English-speaking trekking guide. In the feedback, guides like Prakash and Krishna were called out for being friendly and helpful, with people appreciating their experience with the route and local context.
What you should expect from a good pacing strategy:
- a steady climb without burning your legs early,
- breaks at natural moments (especially before or after the viewpoint),
- and guidance that helps you keep moving while still taking in the views.
Because it’s a private activity for your group, you’re less likely to feel squeezed into a tight schedule with strangers. That makes it easier to stop for photos or look longer at the mountains.
Small note on group dynamics: the pricing mentions group discounts, which can be a win if you’re traveling with friends and want to share the cost. At the same time, the activity being private means you’re not forced into a large mixed group.


Price and Value: Is $55 Actually Fair Here?
At $55, you’re paying for a package: guide, water, entrance fee, and hotel pickup/drop-off from the Lakeside walking area. For a 3–4 hour half-day, that’s a reasonable way to turn a potentially confusing “who-does-what-where” morning into a simple plan.
Here’s what you’re getting:
- English-speaking trekking guide
- Bottle of water
- Entrance fee included
- Hotel pickup and drop off from the Lakeside area (walking distance from Lakeside)
What you’re not getting:
- meals and drinks (you can purchase them)
- and optional gratitude
So the value question becomes: would you otherwise pay for a guide and viewpoint access? In Pokhara, that’s often the key cost. Without a guide, you might still hike it, but you’d spend time figuring out entry points, trail turns, and the safest, most efficient path to Sarangkot.
One more value angle: this hike is short enough that it doesn’t wreck your day. Instead, it sets you up for the rest of Pokhara—cafés, lake walks, and easy sightseeing—without needing to reorganize your whole schedule.
Timing Tips: 8am Start, Best Light, and How to Prepare
The listed schedule starts at 8am, with pickup at your hotel in the Lakeside area. Morning hikes in Pokhara tend to be the sweet spot: you avoid the hottest hours, and the light can be good for mountain viewing.
Some people associate Sarangkot with sunrise-style viewing, and you may see variations in pickup timing depending on the day. If your goal is maximum light for the mountains, ask your operator about how early they can pick you up, especially if your heart is set on sunrise vibes.
What you should pack or plan for (based on what’s included and not included):
- Comfortable hiking shoes (trail can be uneven)
- Light layers (mountain air can feel cooler)
- Sunglasses and sunscreen (the viewpoint portion is exposed)
- A plan for snacks or drinks, since meals aren’t included and you’ll buy as you go
Also, bring some patience with you. Even on an easy hike, Sarangkot is where people stop and look. The schedule allows for time up top, which is exactly what makes the hike worth it.
Entrance Fee Included: Small Detail, Big Relief
This one is easy to overlook until you’re standing somewhere asking where to pay. The entrance fee is included, so your Sarangkot time is less likely to be interrupted by paperwork or searching.
It also helps your guide manage the flow. Instead of scattering your attention across money, ticket lines, and logistics, you can focus on the actual hike.
And since you’ll have a mobile ticket, you don’t need to carry much more than your own essentials and your curiosity.
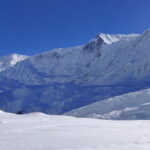
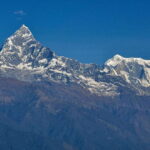
Weather Reality Check: When the Mountains Play Hide-and-Seek
You’re hiking to see the Annapurna range. That’s the whole point. But clouds happen. If the day is hazy or rainy, your view might be reduced.
Even then, I wouldn’t call the trip a waste. You still get:
- a hike through forest and village sections,
- lake glimpses behind you during the ascent,
- and a calmer, greener Pokhara experience than you’d get staying strictly in town.
So the smarter mindset is to treat Sarangkot as a “best chance” viewpoint, not a guarantee. If visibility is great, you’ll feel it immediately. If not, you’ll still come away with a satisfying walk and a better understanding of the Pokhara hillside.
Who This Hike Fits Best
This is a solid match if you want:
- an easy, short hiking option,
- a guided route you can trust,
- and a viewpoint payoff without losing half your day.
It also fits well for first-timers in Pokhara who are staying in Lakeside and don’t want to fuss with transportation to trailheads. Because pickup and drop-off are handled from the Lakeside area, your logistics are lighter.
If you’re someone who wants a long, strenuous trek with big altitude gains, this won’t be that. But if you want “good views plus a real local trail” in about half a day, it’s an excellent shape.
Should You Book This Lakeside to Sarangkot Hike?
I’d book it if your goal is a straightforward morning hike with a clear payoff: forest and village walking up to a viewpoint, then a relaxed return along the lake road. The included guide, entrance fee, water, and pickup/drop-off make it feel like a true package, not a rough DIY plan dressed up as a tour.
Book it especially if you value guidance on the trail. The fact that guides like Prakash and Krishna show up in feedback for friendliness and helpfulness is a good sign that you’ll enjoy the walk, not just tolerate it.
Skip it only if you hate any uphill, even short climbs, or if you’re staying far outside the Lakeside walking pickup zone. In that case, confirm pickup details before you commit.
If the mountains show off, you’ll get a memorable Pokhara morning. If they don’t, you’ll still walk through countryside you can’t see from the main streets.
FAQ
How long is the hike from Lakeside to Sarangkot?
It’s about 3 to 4 hours total, including the time up at Sarangkot and the return walk back toward the Lakeside area.
What time does the experience start?
The schedule lists an 8am start with hotel pickup.
What’s included in the $55 price?
You get an English-speaking trekking guide, a bottle of water, the entrance fee, and hotel pickup and drop-off from the Lakeside area (walking distance from Lakeside).
What’s not included?
Meals and drinks are not included. You can purchase them during the day. Gratitude is optional.
Is it a private tour?
Yes. It’s private, so only your group will participate.
Do I need to buy tickets for Sarangkot?
The entrance fee is included, and you’ll receive a mobile ticket.