REVIEW · KATHMANDU
Gokyo to Everest Base Camp Trek
Book on Viator →Operated by Ace the Himalaya · Bookable on Viator
Everest, plus Gokyo and Cho La—now that is variety. This trek takes you from Lukla up through Namche Bazaar, on to the Gokyo Lakes, over the high Cho La Pass, and finally to Everest Base Camp and Kala Patthar.
I especially like two things here: the trip is structured for altitude with an actual acclimatization day in Namche, and the logistics are handled end-to-end, including flights between Kathmandu and Lukla. I also like that you travel with a licensed English-speaking guide and a porter team (one porter for every two clients), which keeps the trek practical instead of stressful.
One drawback to consider: you’re dealing with real high-altitude exposure and mountain weather. Even with a solid route, basic rooms show up in remote places like Thangna, and the trek can feel long and demanding.
In This Review
- Key takeaways before you commit
- Why this Everest circuit feels different: Gokyo Lakes plus Cho La
- Price and value: what $2,200 covers (and what it doesn’t)
- Getting to Lukla without losing your mind: Kathmandu setup and flight day
- Namche Bazaar acclimatization: the day you’re grateful for later
- The push toward Gokyo: Phakding, Phortse, Machhermo, and the glacier feel
- Gokyo Ri (5,483 m): why the early climb is worth it
- Cho La Pass and Thangna: early starts, basic beds, and weather control
- Lobuche to Everest Base Camp: a big walk near the Khumbu Glacier
- Kala Patthar: where your legs complain and your camera forgets settings
- The return descent: Namche again, Lukla again, relief later
- Guides and porters: the real difference maker
- What to pack (and what they already provide)
- Weather reality: the trek requires good conditions
- Should you book this Gokyo to Everest Base Camp trek?
- FAQ
- How long is the trek and where does it go?
- What’s included in the $2,200 price?
- Do I need my own sleeping bag and down jacket?
- Is the group size limited?
- What time does the trip start in Kathmandu?
- What happens if poor weather cancels the trek?
Key takeaways before you commit
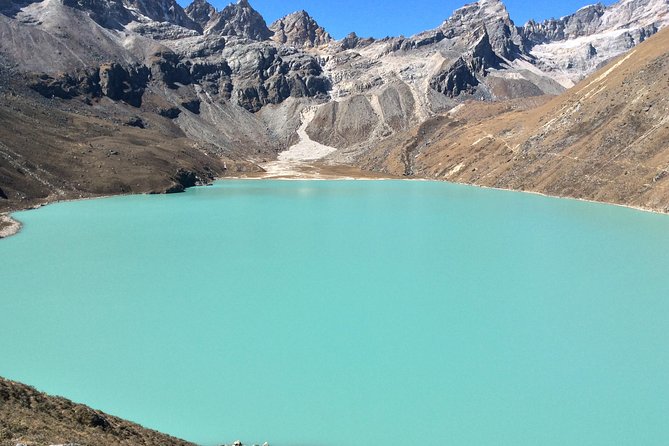
- Gokyo Lakes are the main difference: more scenery and a better rhythm than a straight Everest-only route.
- Cho La adds complexity: plan for early starts and potential weather surprises at altitude.
- Small group size helps: max 15 travelers means easier pacing and more room for safety decisions.
- You get core gear and water support: down jacket, sleeping bag (returnable), and filtered water on the trail.
- Guides seem to prioritize safety and timing: flexibility shows up in how they react to snow and storms.
- Price includes many moving parts: permits, guide, porters, Kathmandu hotels, Lukla flights, and most meals.
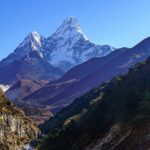
Why this Everest circuit feels different: Gokyo Lakes plus Cho La
Most Everest itineraries sell you the Base Camp stage. This one sells you the full circuit of viewpoints: Namche, Gokyo, Cho La, Base Camp, then Kala Patthar for the classic summit-feeling panorama.
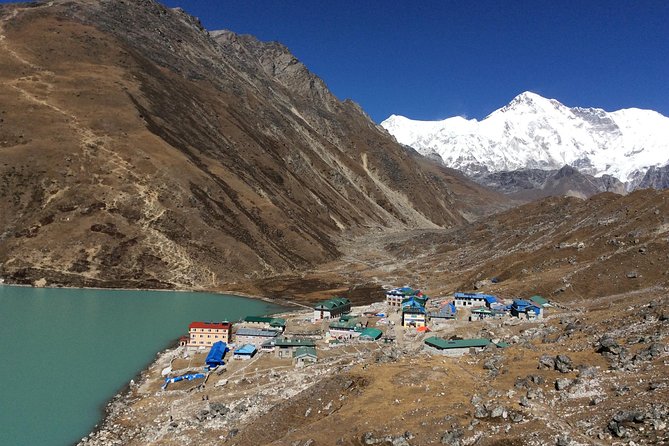
The Gokyo section matters because it gives you a different angle on Everest-area peaks. You get to spend time around the turquoise Gokyo Lakes (and the area west of Everest Base Camp), with a real shot at big views from Gokyo Ri. The route also threads through parts of the Everest region that feel less like a single-file parade.
Then comes Cho La Pass. It’s not just another climb; it’s a high pass (listed around 5,330 m) where timing matters. The trek starts very early for the crossing so you avoid afternoon weather, and your day can be adjusted based on conditions.
You can also read our reviews of more hiking tours in Kathmandu
Price and value: what $2,200 covers (and what it doesn’t)
At $2,200 per person, this isn’t a budget trek. But the value is in what’s included, especially if you’d otherwise have to piece together flights, permits, lodging, and gear.
Included items you’ll feel in your day-to-day:
- Kathmandu airport transfers and two nights in a three-star hotel (twin-share/double).
- Kathmandu–Lukla–Kathmandu airfare.
- Permits for trekking.
- Licensed English-speaking guide plus 1 porter for every two clients.
- Trek lodging for 14 nights, in guest houses (with attached toilets noted for Lukla, Phakding, and Namche).
- Meals on the trail: breakfast (16), lunch (14), dinner (14).
- Gear: a down jacket and sleeping bag (to be returned).
- Filtered water using a Katadyn Pocket Water Filter, plus seasonal fruit during the trek.
- A free Ace the Himalaya duffel/kit bag and sun hat.
What’s not included matters too:
- Meals in Kathmandu (after the trek).
- Travel insurance that covers emergency high-altitude rescue/evacuation.
- International airfare and Nepal entry visa.
- Alcohol and personal drinks.
- Tips for trekking staff and drivers (tipping is expected).
If you’re the type who wants your time on the ground to be about the trail, not constant admin, this package fits well. If you’re already set up with your own gear and you prefer DIY routing, the price may feel steep.
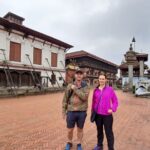
Getting to Lukla without losing your mind: Kathmandu setup and flight day
Your experience begins in Kathmandu with an airport representative meeting you at Tribhuvan International Airport. The key first practical point: you’re starting with the rhythm of mountain logistics right away, because the trek’s “real altitude work” begins once you fly to Lukla (listed at 2,804 m).
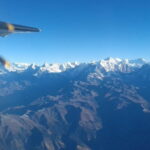
This trek uses the classic Kathmandu-to-Lukla route with a scenic flight into Tenzing and Hillary Airport. Flights can be weather-sensitive in the Himalayas, which is why your operator mentions the trek requires good weather. The good news: you’re also carrying a plan with a guide and group pacing, so you’re not left improvising.
In Kathmandu, you also get two nights in a three-star hotel. That’s a meaningful buffer before the cold, dust, and early starts.
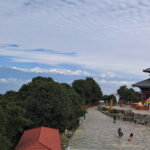
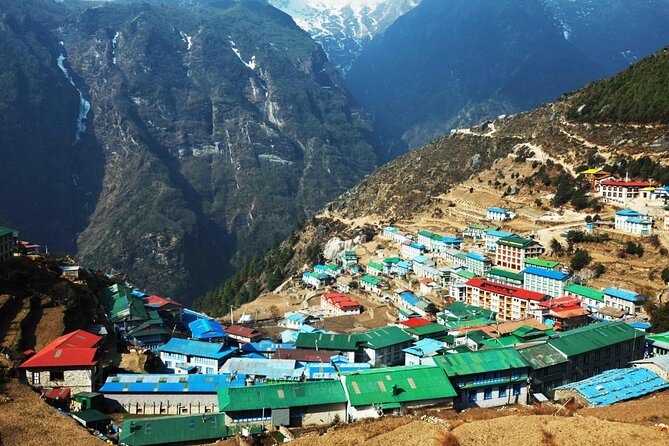
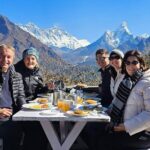
Namche Bazaar acclimatization: the day you’re grateful for later
You spend time in Namche Bazaar to adjust to thinning air. This is one of the best choices in any Everest circuit: you don’t just race upward and hope your body keeps up.
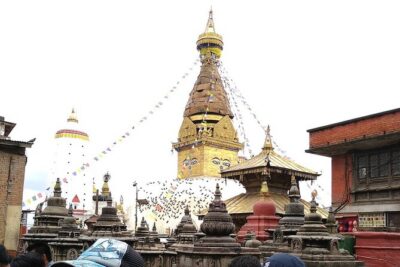
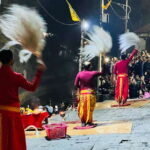
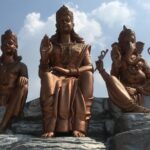
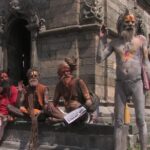
Namche is also where you settle into the cultural side of the region. You’ll find Sherpa-influenced life, and the plan includes time to visit a museum focused on Sherpa traditions and customs. It’s not only about learning; it’s about slowing down so your lungs and legs can catch up.
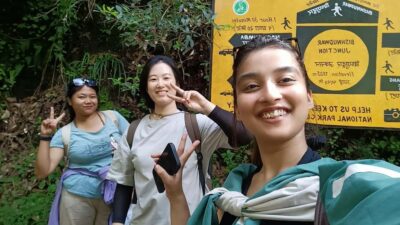
Then, once you’re acclimatized, you move on. You’ll trek through the Sagamartha National Park area and follow suspension bridges over the Dudh Kosi more than once. That repeated river-crossing is a reminder: the trail can feel “alive” day-to-day, not like one long staircase.
The push toward Gokyo: Phakding, Phortse, Machhermo, and the glacier feel
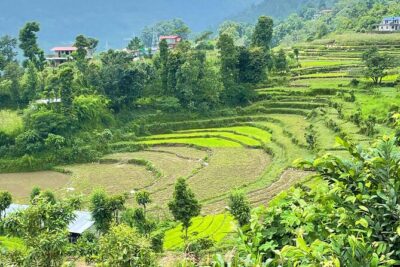
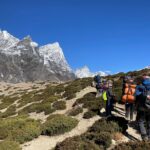
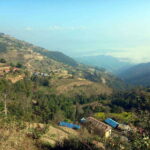
After Namche, the route carries you through villages and higher ridges—rhododendron forests early on and then more high-altitude vegetation as you gain elevation. Places like Phortse and Machhermo matter because they’re both scenic and functional: they help you build altitude gradually while moving toward Gokyo.
Machhermo is a turning point. You reach a ridge for views and then move down and back up, eventually getting close to the terminal moraine of the Ngozumpa glacier. Even without going “full glaciology nerd,” you’ll feel the scale of the terrain here. The air gets thinner, and the landscape starts to look more engineered by ice and rock than by farming.
Camps in this zone are where the trek starts to become very real for your body. Expect long walking hours and cooler nights. The trade-off is that the views start getting serious well before the highest days.
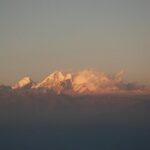
Gokyo Ri (5,483 m): why the early climb is worth it
Gokyo is your base for two nights, which is a helpful change from a nonstop grind. You can use that time for short hikes and sightseeing around the Gokyo area instead of immediately moving camp again.
Then you go for Gokyo Ri, climbing to about 5,483 m. The itinerary has an early start for this day, and it’s described as steep. That’s the classic pattern: a short but demanding ascent that pays you back with sweeping views of the Gokyo valley and major peaks around it.
This is also where your circuit starts to feel like a “choose your angle” trek. From Gokyo Ri you’re positioned differently than from Kala Patthar, so the mountain picture isn’t a copy-paste of the Everest Base Camp finale.
Cho La Pass and Thangna: early starts, basic beds, and weather control
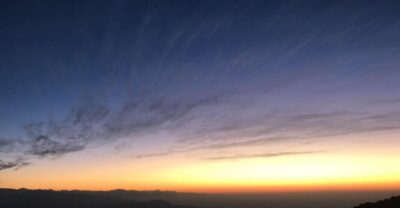
Cho La Pass is the signature high pass crossing in this route (listed around 5,300 m for the crossing altitude). The trek plan starts walking before sunrise (around 4:00 or 5:00 am) so you reach the pass by late morning and avoid bad weather in the afternoon.
This is one of the days where your guide’s judgment matters. In feedback from Ace the Himalaya trips, guides like Nima are praised for being flexible in crazy snow and weather while keeping a clear safety-first approach and good decision guidance. That kind of mindset can help you avoid pushing when conditions aren’t friendly.
After the pass you stay in Thangna, which is described as very basic and dormitory-based because it’s remote. That’s not a dealbreaker, but it’s a real expectation setter. If you need privacy or comfortable bedding, you’ll want to prepare yourself mentally for the rougher end of mountain accommodations.
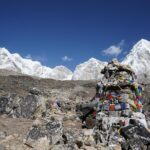
Lobuche to Everest Base Camp: a big walk near the Khumbu Glacier
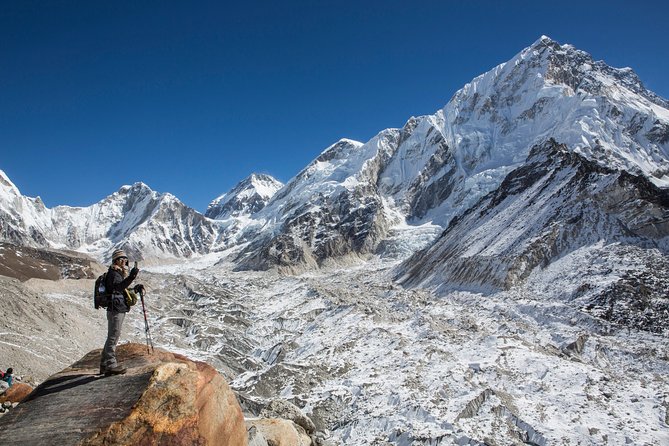
Lobuche is your next stop before the big Base Camp day. The route makes the approach feel staged: you’re not just jumping from high pass straight into the most famous glacier walk.
On Everest Base Camp day, you head along the Khumbu Glacier and up to Everest Base Camp at about 5,365 m. This is framed as one of the biggest and more difficult days, but it’s also one of the most rewarding because you’re near the place people dream about—without needing mountaineering equipment.
You should expect the day to feel long and physically demanding. The payoff is perspective: the glacier and the Base Camp environment give you a sense of scale that’s hard to absorb from photos. And because you’re still moving through the region rather than sitting in a lodge, it keeps the trek feeling like work you earned, not a sightseeing coupon.
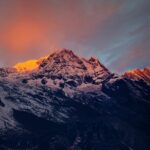
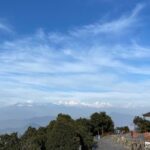
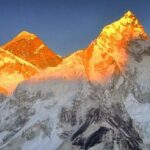
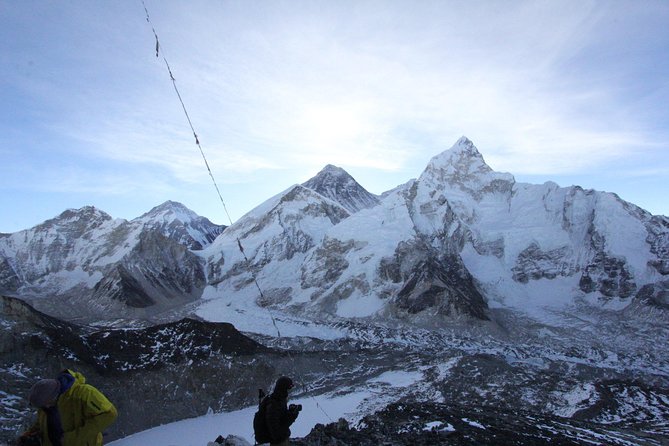
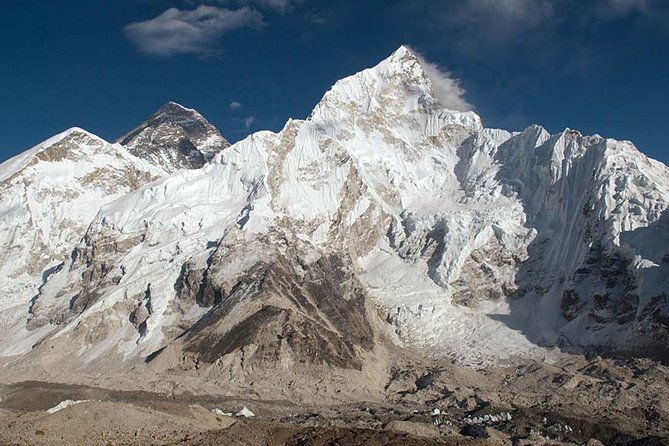
Kala Patthar: where your legs complain and your camera forgets settings
Kala Patthar is described as the most difficult yet rewarding day on the trek, with the ascent to around 5,555 m. This is the classic “one more climb” moment, because it’s high and it can be steep.
The reason it’s worth it is simple: you get one of the most dramatic panoramic rewards in the Everest region. If you’re hoping for that image where Everest and surrounding peaks fill the frame, this is the day that tends to deliver.
In practice, this is also where your pacing and breathing strategy matter most. Start slow, keep steady, and trust the guide’s timing. If conditions are poor, your guide’s flexibility and safety-first decision making becomes part of the experience, not a footnote.
The return descent: Namche again, Lukla again, relief later
After Kala Patthar, you descend back through Pangboche and Tengboche and continue to Namche Bazaar. You arrive back in Namche in the afternoon, which gives you some recovery breathing room.
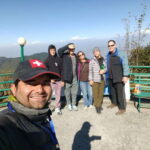
Then the trek ends at Lukla, where it began. That last stretch feels different from the climb: less about altitude conquest and more about reflection and regrouping as a group.
Finally, you fly back to Kathmandu for your hotel transfer and then your departure airport drop-off. That end-stage is when you realize how much the trek “rearranged your days” around walking, altitude, and early starts.
Guides and porters: the real difference maker
In a trek like this, the route is the route. The guide is what turns that route into a safer, smoother experience.
Ace the Himalaya’s guides mentioned in feedback include people like Nima, Raj N, Raj Kumar, Ramesh, Lakpa Sherpa, and Ganesh. Across those comments, a few themes show up: kindness, strong logistics support, and flexibility when weather or trail conditions change. Porter experiences are also praised, with names like Biroj and Sonam appearing in feedback as consistently helpful, smiling, and strong.
The porter ratio (one porter for every two clients) is a practical design choice. It matters on a high trek because it lowers the load you carry, which can reduce fatigue when altitude is already working against you. Even with that support, you’ll still be walking a lot—just with less weight on your back.
What to pack (and what they already provide)
You’re given a down jacket and sleeping bag (returnable), which removes one of the biggest packing headaches for international travelers. You still need to bring the clothing and gear that fit how you personally walk, sleep, and stay warm.
Practical items to plan for:
- Warm layers for cold nights and high mornings.
- Trekking poles (often very helpful on descents).
- A comfortable daypack for water and layers.
- Sun protection: the included sun hat helps, but you’ll still want sunglasses and sunscreen.
Because filtered water is included using a Katadyn Pocket Water Filter, you can travel with less worry about hydration logistics. Still, you’ll want to treat water habits seriously at altitude: drink consistently even when you don’t feel thirsty.
Weather reality: the trek requires good conditions
This route is described as requiring good weather. That’s not marketing talk; it’s altitude math. The high pass (Cho La) and the big viewpoint climbs depend on visibility and trail safety.
The good news is that your experience includes an operator readiness to handle conditions, and feedback highlights guide flexibility during snowstorms. The trek also starts early on key days (like the Cho La pass crossing and Gokyo Ri), which is how good tours manage risk.
Should you book this Gokyo to Everest Base Camp trek?
I’d book it if you want a classic Everest endpoint but also want a route that builds in extra rewards: the Gokyo Lakes, the Cho La crossing, and a strong viewpoint sequence that doesn’t feel like one long straight line.
It’s a good fit if:
- You have a moderate physical fitness level and you’re ready for a demanding, high-altitude trek.
- You want guided safety and logistics, plus porter support.
- You value an acclimatization pause in Namche rather than rushing.
Skip it or think twice if:
- You hate cold nights and basic accommodations in remote areas like Thangna.
- You don’t have travel insurance that covers emergency high-altitude evacuation.
- You’re not comfortable with early starts and weather-dependent mountain travel.
FAQ
How long is the trek and where does it go?
The overall experience is listed as about 17 days. The route follows a circuit through Lukla, Namche Bazaar, Gokyo, Cho La Pass, Lobuche, Everest Base Camp, Kala Patthar, and then back down to Namche and Lukla, finishing in Kathmandu.
What’s included in the $2,200 price?
The price includes Kathmandu airport transfers, Kathmandu lodging for two nights in a three-star hotel, trek lodging for 14 nights (twin-share/guest house style as described), a licensed English-speaking trekking guide, one porter for every two clients, trekking permits, Kathmandu–Lukla–Kathmandu airfare, down jacket and sleeping bag (to be returned), filtered water on the trail, seasonal fruits, and most meals (breakfast, lunch, and dinner during the trek).
Do I need my own sleeping bag and down jacket?
No. The trek includes a down jacket and sleeping bag for the duration of the trek, and you return them at the end.
Is the group size limited?
Yes. The maximum group size is listed as 15 travelers.
What time does the trip start in Kathmandu?
The start time is listed as 8:00 am, with the meeting point at Tribhuvan Airport in Kathmandu.
What happens if poor weather cancels the trek?
The experience requires good weather. If it’s canceled due to poor weather, you’ll be offered a different date or a full refund.