REVIEW · KATHMANDU
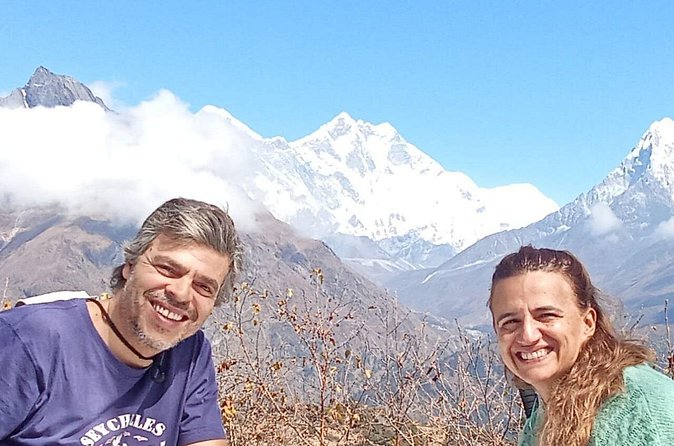
Everest Base Camp Trek Via Gokyo Lake and Cho La Pass
Book on Viator →Operated by Marvel Treks and Expedition · Bookable on Viator
Cho La Pass plus Everest Base Camp in one trek is rare. I love how this route pairs Everest views with the calm, high-altitude Gokyo Lakes, and I also like the structure: a licensed English-speaking guide and porter support to help you manage the daily grind.
My main caution is simple: this is a serious, high-altitude plan with an early, icy Cho La Pass crossing, so bad weather or slower acclimatization can make certain days feel tight.
In This Review
- Key Things That Make This Trek Worth Your Time
- A Trek That Juggles Everest, Gokyo Lakes, and Cho La Pass
- Price and Logistics: What $1,000 Covers (and What It Doesn’t)
- Entering the Everest Rhythm: Kathmandu to Lukla to Namche
- Day 1: Kathmandu setup
- Day 2: Lukla flight and first trek to Phakding
- Day 3: Namche Bazaar and first real Everest moments
- Day 4: Optional Everest View Hotel hike
- Tengboche, Dingboche, and Lobuche: Monasteries and the High-Altitude Staircase
- Day 5: Tengboche Monastery
- Day 6: Dingboche and crossing Imja Khola
- Day 7: Lobuche and the climber memorials
- Everest Base Camp Day: Khumbu Glacier and the Big Achievement Moment
- Day 8: Gorak Shep to Everest Base Camp and back
- Day 9: Kala Patthar sunrise and the drop toward Dzongla
- Pivot to Gokyo: The Cho La Pass Crossing and Icy Morning Work
- Day 10: Cho La Pass to Gokyo Valley
- Day 11: Panoramic climb and Gokyo Lakes (3rd and 4th)
- Returning Through Namche: Hot Shower Time and Dudh Koshi Legs
- Day 12: Back toward Namche (and hot shower reward)
- Day 13: Dudh Koshi River to Lukla
- Day 14: Early flight to Kathmandu, then freedom time
- Teahouses, Meals, and the Practical Stuff Nobody Loves Talking About
- The duffel bag system
- Guides, Safety, and Why Support Changes the Whole Experience
- When This Trek Fits Best (and When to Rethink)
- Should You Book This Everest Base Camp via Gokyo and Cho La Trek?
- FAQ
- Where does the trek start and end?
- What’s included in the trek price?
- Are international flights included?
- Do I need a Nepal visa?
- What accommodation should I expect?
- Are meals covered during the trek?
- Is Cho La Pass part of the route?
- Do I need travel insurance?
- What gear is not included, and can I rent it?
- Is this a private group trek?
Key Things That Make This Trek Worth Your Time
- Classic Everest route, then a second act toward Gokyo and back, instead of a one-trick itinerary
- Cho La Pass early start for better timing on the icy crossing
- Sunrise at Kala Patthar followed by a drop through Lobuche toward Dzongla
- Teahouse rhythm with all meals during the trek, plus one hotel night in Kathmandu
- Sagarmatha National Park and TIMS permits handled for you
- Emergency oxygen included in the safety plan, which matters on hard days
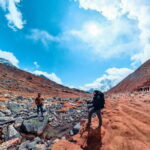
A Trek That Juggles Everest, Gokyo Lakes, and Cho La Pass
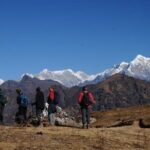
If you’re the kind of person who wants Everest without doing only Everest, this trek makes sense. Day after day, you bounce between big viewpoints, Sherpa villages, monasteries, and glacier country. Then you add Gokyo Lake days and a real pass crossing—Cho La—where timing and cold can change how the day feels.
The bonus here is variety. You get the classic Everest storyline: Namche Bazaar, Tengboche, the Khumbu Glacier walk, and the big moment at Kala Patthar. But you also get the quieter side of Everest country: fewer people, wide views over water, and a different kind of altitude pressure as you move toward Gokyo.
One more thing I appreciate is how the plan balances effort with rest. You’ve got trekking days that step upward gradually, then days built around specific “payoff moments” (like sunrise or panoramic climbs). That helps you pace your head and lungs, not just your legs.
You can also read our reviews of more hiking tours in Kathmandu
Price and Logistics: What $1,000 Covers (and What It Doesn’t)

Let’s talk value like adults. At about $1,000 per person, you’re not just paying for footsteps on a trail. You’re paying for a package that includes key costs that many trekkers end up handling separately.
Included items that matter most:
- Round-trip domestic flights Kathmandu–Lukla–Kathmandu
- 1 night hotel in Kathmandu with breakfast
- All meals (breakfast, lunch, dinner) during the trek
- 12 nights twin-sharing teahouse accommodation
- Licensed English-speaking guide and porter support (with a 1:2 ratio)
- Sagarmatha National Park and TIMS permits
- Airport transfers (arrival and departure)
- Duffel bag for trekking gear (returned at the end)
Now the not-included list is also pretty important:
- International airfare and the Nepal visa fee on arrival
- Kathmandu lunches and dinners (you’ll be on your own there)
- Personal trekking gear (boots, jacket, poles, etc.). You can rent in Kathmandu, which can save you from lugging everything
- Travel insurance (mandatory)
- Tips for guide and porter (optional in paperwork, but realistically expected)
- Small extras in teahouses: hot showers, Wi-Fi, battery charging
So is $1,000 a good deal? For Everest country, it can be, especially because flights, meals, permits, and guide/porter support are all baked in. Where the value really shows up is that you’re not stuck trying to line up half the trip yourself in a short time window.
Entering the Everest Rhythm: Kathmandu to Lukla to Namche
You start in Kathmandu with a pickup at Tribhuvan International Airport. Your guide meets you with a name sign, then you get a trek briefing and gear check. This is the part people underestimate. A quick gear check can prevent misery later—bad layers, missing gloves, or poles that don’t fit well.
Day 1: Kathmandu setup
You’ll likely spend the day orienting your body and your kit. Even if you feel fine, use this time to plan how you’ll handle cold mornings and long stretches. The trek itself is later. This day is for getting ready.
Day 2: Lukla flight and first trek to Phakding
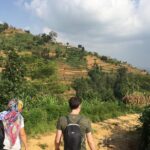
You fly to Lukla by a scenic flight. Then you trek through Sherpa villages toward Phakding, crossing the kind of suspension bridges that signal you’ve left the road world behind.
Practical note: the first day is about moving without rushing. You’re watching the terrain and getting your legs used to a heavy daypack (plus the mental rhythm of altitude country).
Day 3: Namche Bazaar and first real Everest moments
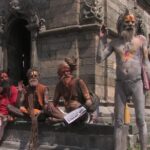
Cross suspension bridges into Sagarmatha National Park, and you get your first strong glimpse of Everest. Namche Bazaar is where the trip starts feeling like a real community: shops, tea houses, and people moving for the same reason you are.
Day 4: Optional Everest View Hotel hike
Day 4 includes an optional hike to Everest View Hotel at 3,880m. This is the kind of acclimatization day that pays off. Even if you skip it, you still have the market and Sherpa museum time.
This is also where I think about pacing. You don’t have to “win” every day. The best trekkers often look calm and steady, not aggressive.
Tengboche, Dingboche, and Lobuche: Monasteries and the High-Altitude Staircase
After Namche, the route climbs through prayerful scenery and higher, sharper air. It’s not just physical. You’ll feel a change in how long it takes to recover after each uphill.
Day 5: Tengboche Monastery
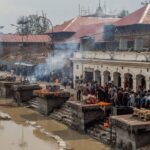
You trek through pine forest with views of Thamserku and Everest, then visit Tengboche Monastery. Monasteries on these routes do more than decorate the day. They give you a human pause point—place to sit, look around, and remember this is living culture, not just a photo backdrop.
Day 6: Dingboche and crossing Imja Khola
You cross Imja Khola, pass Pangboche, and start feeling the altitude more clearly. Dingboche tends to be where “walking slower” becomes part of your strategy.
If you’re prone to pushing on day one, this is your reminder: the mountain doesn’t care about your schedule.
Day 7: Lobuche and the climber memorials
You walk alpine terrain and pass memorials for climbers, then gradually ascend to Lobuche. That mix—beautiful high-country walking plus remembrance—hits harder than you expect.
This is also a day where your body will tell you the plan is real. Hydrate, keep a steady pace, and don’t try to “catch up” if you fall behind early.
Everest Base Camp Day: Khumbu Glacier and the Big Achievement Moment
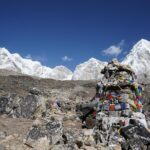
Day 8: Gorak Shep to Everest Base Camp and back
You reach Gorak Shep and follow the Khumbu Glacier to Everest Base Camp. You take photos, feel the achievement, then head back to Gorak Shep.
The key here is timing and energy management. Base Camp is a milestone, but it’s not a rest day. You’re moving in cold, thin air, often with wind. The best experience often comes from being methodical rather than frantic.
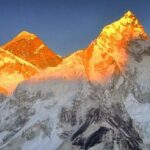
Day 9: Kala Patthar sunrise and the drop toward Dzongla
Day 9 is built around sunrise from Kala Patthar. Then you trek down to Lobuche and on to Dzongla.
Sunrise days can be chilly and demanding, but the payoff is the kind you remember for years. Still, it’s not “free.” You earn it with early hours and careful footwork on the descent.
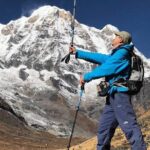
Pivot to Gokyo: The Cho La Pass Crossing and Icy Morning Work
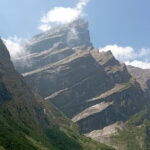
Here’s the part that turns a great Everest trek into something more adventurous. On Day 10, you cross Cho La Pass early morning, described as icy, then descend into the quiet Gokyo Valley.
That early timing matters. You’re trying to catch conditions that are as safe as possible. Pass days can feel like a different sport: more attention on footing, fewer shortcuts, more focus on steady movement.
Day 10: Cho La Pass to Gokyo Valley
After the pass, you descend and get a new set of views. The Gokyo Valley can feel quieter and more spacious than the Everest corridor. You’re trading the constant Everest “draw” for a different kind of awe: water, glacier views, and wide sky.
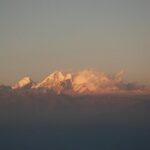
Day 11: Panoramic climb and Gokyo Lakes (3rd and 4th)
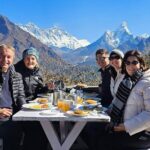
You climb in the morning for panoramic views of Everest, Cho Oyu, and Makalu, then visit the 3rd and 4th Gokyo Lakes.
These lake days are why I’d choose this specific version over a straight Everest-only itinerary. The lakes add a calm contrast to the glacier and pass work. And they give you photo angles that don’t feel like repeats of the Everest route.
Returning Through Namche: Hot Shower Time and Dudh Koshi Legs
After you’ve hit the high and the dramatic, your final days become about getting back safely and comfortably.
Day 12: Back toward Namche (and hot shower reward)
You descend past Machhermo, Dole, and Khumjung, then reach Namche for a hot shower and rest.
This is where good planning shows. A rest day in Namche isn’t wasted time. It helps your body recover before the last long trek to Lukla.
Day 13: Dudh Koshi River to Lukla
Your final trekking day follows the Dudh Koshi River to Lukla. It’s long enough to feel real, but river valleys often make the walking more forgiving than high, rocky sections.
Day 14: Early flight to Kathmandu, then freedom time
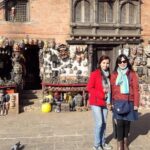
You fly back to Kathmandu early. Then you have free time for rest, shopping, or an optional massage. Your trip ends back at the meeting point.
Teahouses, Meals, and the Practical Stuff Nobody Loves Talking About
A lot of trek reviews get poetic. I’ll keep it practical.
You’ll sleep in twin-sharing teahouses for 12 nights, with all meals included during the trek. That’s a big value point, because food planning at altitude can get expensive fast if you’re paying day by day.
What isn’t included are the extras that many people want at some point:
- hot showers (you’ll pay)
- Wi-Fi
- battery charging
Also, teahouses can be comfortable, but they’re still basic. Expect simple rooms, shared spaces, and the reality that cold mornings are part of the schedule. Bring the right layers and you’ll enjoy the experience more.
The duffel bag system
You get a duffel bag for trekking gear, returned later. It’s there to make your pack management easier and to support porter carrying. Even if you’re in good shape, saving your energy for the long climbs is smart.
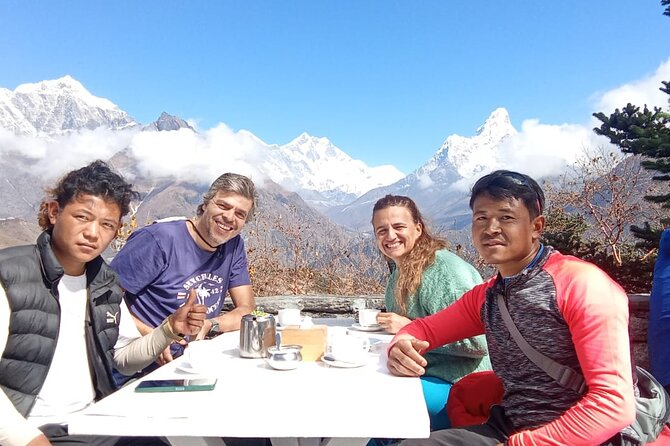
Guides, Safety, and Why Support Changes the Whole Experience
I like trekking with a real support system. This one includes a licensed English-speaking trekking guide plus porter support with a 1:2 ratio.
You also get safety support including emergency oxygen. That doesn’t mean you plan for emergencies. It means the organizers are thinking like trekkers, not like brochure writers.
One small detail I appreciate: in past treks run by Marvel Treks and Expedition, guides have been praised for being friendly and reassuring when people feel discomfort. Names like Udio and Shisir show up in other client experiences, which tells me the company puts effort into how guides act, not just what they know. For your trip, your exact guide may differ, but the pattern is encouraging: calm leadership matters when you’re tired and altitude is testing your patience.
When This Trek Fits Best (and When to Rethink)
This trek is for you if:
- you have moderate physical fitness
- you want a classic Everest storyline plus Gokyo Lakes plus Cho La Pass
- you’re okay with teahouses, long days, and cold mornings
- you want meals, flights, permits, and guide support handled
It may not be the best match if:
- you’re easily overwhelmed by early starts and pass days
- you don’t like structured plans and prefer total freedom
- you’re not ready for altitude to change your pace (it will)
If you’re the type who needs everything to be flexible and spontaneous, a fixed 14-day plan won’t feel “free.” If you can follow a pace and trust the schedule, you’ll likely love it.
Should You Book This Everest Base Camp via Gokyo and Cho La Trek?
I’d book it if your ideal Everest trip has more than one kind of awe in it. The mix is the point here: Everest Base Camp days for achievement, Gokyo Lakes days for calm, and Cho La Pass for real high-mountain seriousness.
I would pause and think twice if you’re worried about early, icy conditions or if you’re not comfortable with altitude slowing you down. This route is rewarding, but it asks you to be steady and practical.
If you do book, plan for the real-world extra costs: gear (or rentals in Kathmandu), Nepal visa, travel insurance, and the small teahouse fees that pop up for comfort items. Then show up ready to move, drink water, and take acclimatization seriously. That’s how the trek feels like an adventure instead of a fight.
FAQ
Where does the trek start and end?
The start meeting point is Tribhuvan International Airport (Ring Rd, Kathmandu, Nepal). The activity ends back at the meeting point.
What’s included in the trek price?
Included are round-trip domestic flights (Kathmandu–Lukla–Kathmandu), 1 night hotel in Kathmandu with breakfast, all meals during the trek, 12 nights twin-sharing teahouse accommodation, a licensed English-speaking trekking guide and porter support, Sagarmatha National Park and TIMS permits, airport transfers, a duffel bag for trekking gear (returned), and government taxes/trekking service charges.
Are international flights included?
No. International airfare is not included.
Do I need a Nepal visa?
Yes. The Nepal visa fee on arrival is not included.
What accommodation should I expect?
You’ll stay 1 night in a hotel in Kathmandu with breakfast, then 12 nights in twin-sharing teahouses during the trek.
Are meals covered during the trek?
Yes. Breakfast, lunch, and dinner are included during the trekking portion.
Is Cho La Pass part of the route?
Yes. The itinerary includes crossing Cho La Pass early morning on Day 10.
Do I need travel insurance?
Yes. Travel insurance is mandatory and not included.
What gear is not included, and can I rent it?
Personal trekking gear like boots, jacket, and poles is not included. You can rent personal trekking gear in Kathmandu.
Is this a private group trek?
Yes. It’s listed as a private tour/activity, with only your group participating.