REVIEW · POKHARA
Pokhara: Paragliding Adventure with Photos and Video
Book on GetYourGuide →Operated by Linkage Tour & Travel · Bookable on GetYourGuide
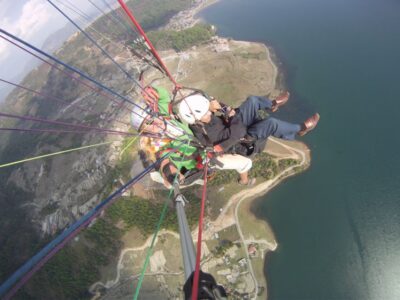
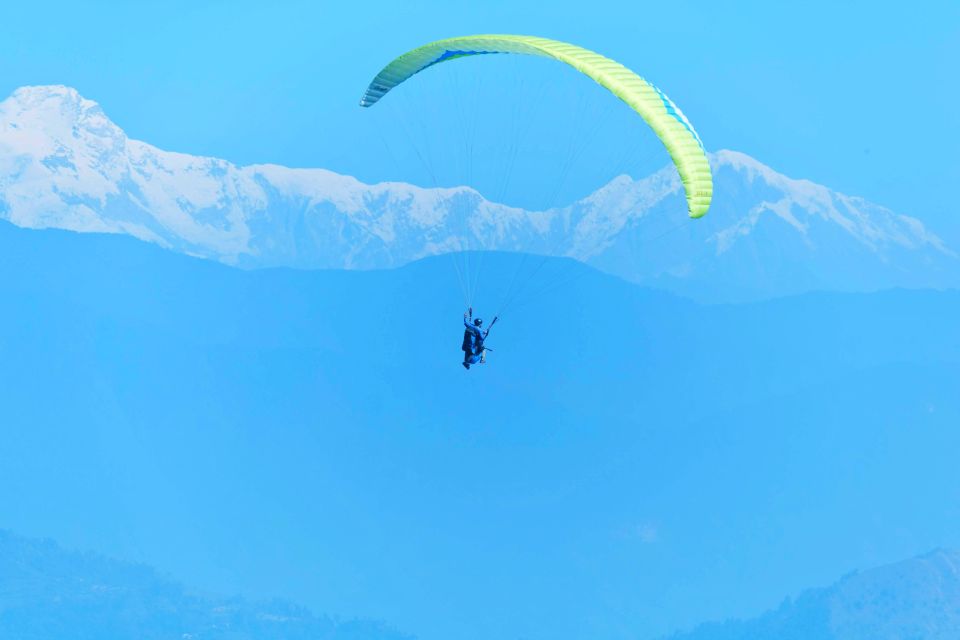
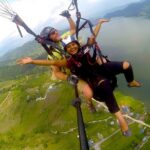
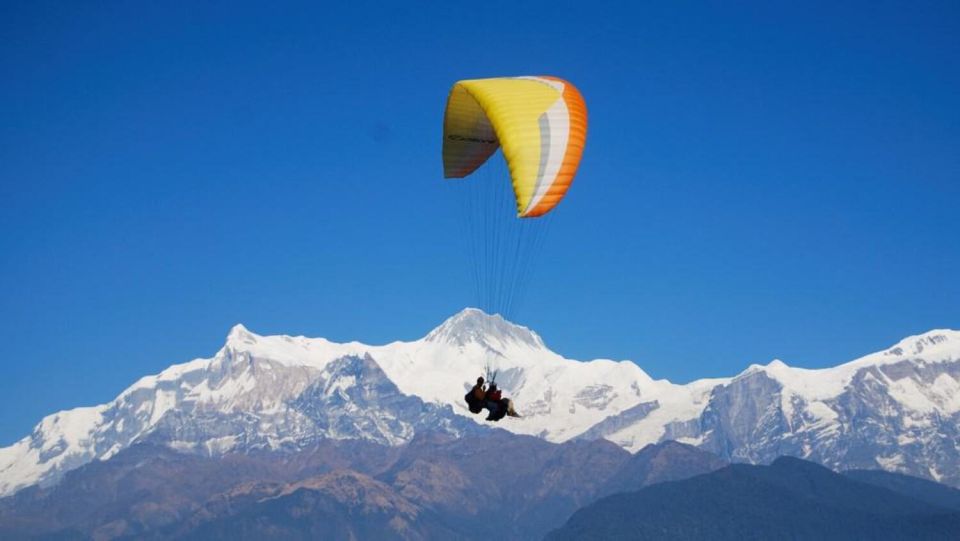
Pokhara paragliding is the quickest way to feel the sky. From Lakeside, you ride up to Sarangkot and glide above Phewa Lake and the Himalayan views with a pilot right there with you. I loved the calm, confidence-first briefing and the included photo and video set that lets you relive the moment. One thing to plan for: keep your packing light, because a bigger bag may have to wait in the van and get dropped later.
What makes this flight so appealing is how simple it feels once you’re airborne. You’re not wrestling the canopy or trying to figure out wind or turns; your tandem instructor runs the show while you focus on breathing and looking out. The most common “downside” is mental: the takeoff can feel a bit intense at first, but the experience turns peaceful fast.
This is a 3-hour outing with a small group (up to 9 people) and an English-speaking instructor. Flights run year-round, but the best flying windows tend to be September to November and March to May, when conditions are usually more suitable. Also note the weight rule: if you’re over 95 kg, there’s an extra fee.
In This Review
- Key points to know before you fly
- Entering Sarangkot: How the 3-Hour Plan Really Works
- Sarangkot Takeoff to Smooth Landing: What the Flight Feels Like
- What You’ll Actually See: Phewa Lake, Forests, and Himalayan Views
- Safety First: English Instruction and Tandem Pilots You Can Trust
- Photos and Paragliding Video: The Stuff You’ll Want Later
- Price and Value: Is $86 Worth It?
- Timing, Group Size, and Packing for an Easy Day
- Best Months to Fly in Pokhara: When the Air Is Most Friendly
- Who Should Book This Tandem Paragliding Flight?
- Should You Book This Pokhara Paragliding Adventure?
- FAQ
- How long is the paragliding experience?
- Where do you get picked up and dropped off?
- Do I need prior paragliding experience?
- Is there a minimum age requirement?
- What’s included in the price?
- Are food and drinks included?
- What’s the best time of year to go?
- Is there a weight limit?
- Is there cancellation flexibility?
Key points to know before you fly
- Sarangkot hill station launch: the famous takeoff area just outside Pokhara sets you up for great viewing time
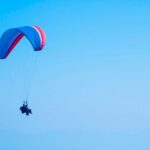
- Tandem control: your pilot handles steering and safety so you can enjoy the ride
- ~30-minute glide: enough time to spot Phewa Lake, forests, and villages without feeling rushed
- Included photos and short video: you get the content without needing a camera setup
- Small group pace: limited to 9 participants, which helps things feel less chaotic
- Light-packing advice: bring essentials only; a cafe at the landing site can cover basic needs
Entering Sarangkot: How the 3-Hour Plan Really Works
You start in the Lakeside area with pickup included, so you don’t have to arrange transport or find your own way out of town. The total time on the day is about 3 hours, which covers the drive, check-in, briefing, and the full experience around your flight.
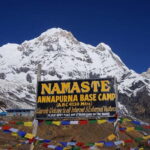
From Lakeside, the vehicle takes you up to Sarangkot, the takeoff hill station. This matters because Sarangkot isn’t just a random launch spot; it’s known for starting flights at a height that gives you that classic “soaring above Pokhara” feeling.
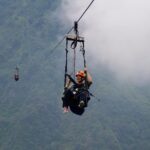
When it’s time, your pilot handles the setup, and you’ll follow instructions closely during takeoff. If you’ve ever been nervous before trying something physical, treat the takeoff like a short checklist moment. Then, once you’re up, the experience shifts into quiet gliding.
After landing, you return to Lakeside. In practice, there’s often a bit of waiting around—weather and flight timing can affect the schedule—but the format stays the same: get briefed, fly, land, then go back.
You can also read our reviews of more photography tours in Pokhara
Sarangkot Takeoff to Smooth Landing: What the Flight Feels Like
Most first-timers worry about the physical effort. Here’s the good news: once you’re airborne, it’s not strenuous. You’ll be harnessed in tandem with your pilot, and you can stay relaxed while you take in the views.
The part that can feel daunting is the very start—standing near the launch area and running through the wind and motion while you get ready to lift. My best advice is simple: listen once, then follow the pilot’s cues without overthinking. Pilots are used to calming nervous riders fast, and it shows in how they coach you through each step.
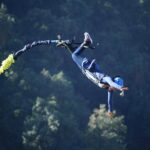
Once you’re in the air, the tone changes quickly. You go from “am I doing this right?” to “wow, the view keeps opening.” Many flights described as peaceful after takeoff match what you’ll likely feel in the first few minutes above the hills.
The landing is designed to be controlled and smooth. Your pilot will manage the descent and touchdown, and your job is mostly to stay comfortable in the harness and let them guide you. If you’re the kind of person who wants a clear plan, you’ll appreciate how structured everything feels.
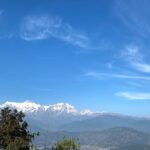
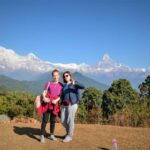
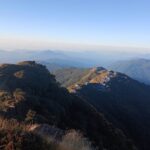
What You’ll Actually See: Phewa Lake, Forests, and Himalayan Views
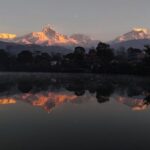
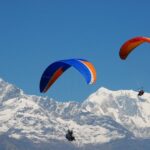
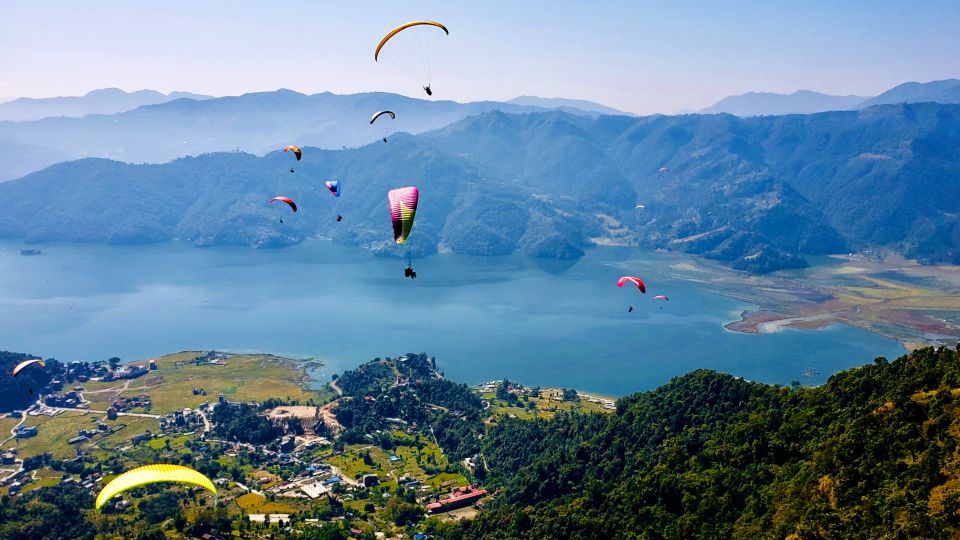
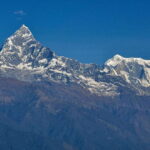
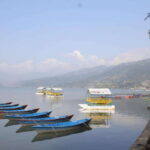
This flight is built around the big visual payoff: mountains and Pokhara’s natural features from above. A typical run takes you along with a wide view that includes Phewa Lake, surrounding forests, and scattered villages below.
From the air, the lake looks like a calm center point while the hills and tree lines form a soft, layered pattern around it. That contrast—still water below, air movement above—is a big part of why people remember this as more than just an adrenaline activity.
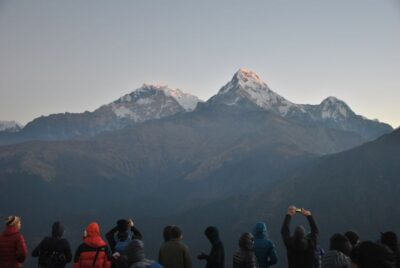
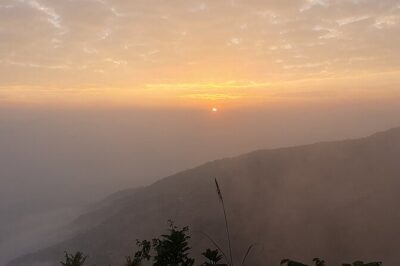
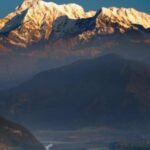
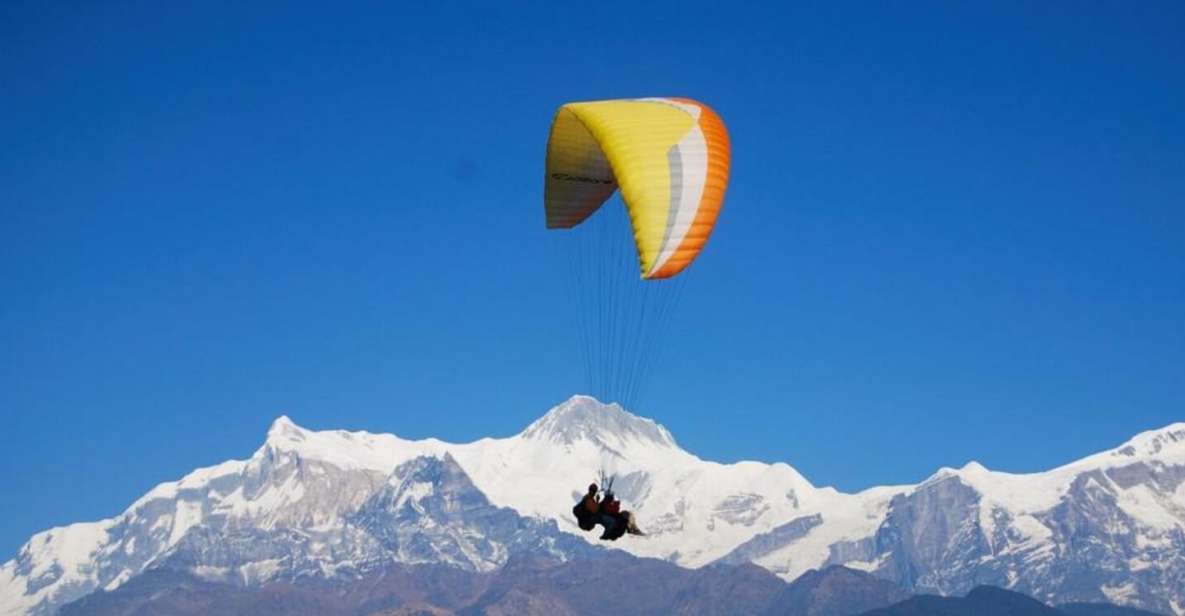
You also get a clear “Himalayas in the background” feeling. Even when weather varies, you’re still launching from a vantage that gives you a strong mountain-view chance. If you’re traveling to Nepal for the scenery, this is one of the easiest ways to see it without hiking for hours.
Pro tip: use your first few minutes to look slowly. It’s tempting to whip your head around right away, but the best views often reveal themselves after you’ve settled into the glide and your mind has caught up to the altitude.
Safety First: English Instruction and Tandem Pilots You Can Trust
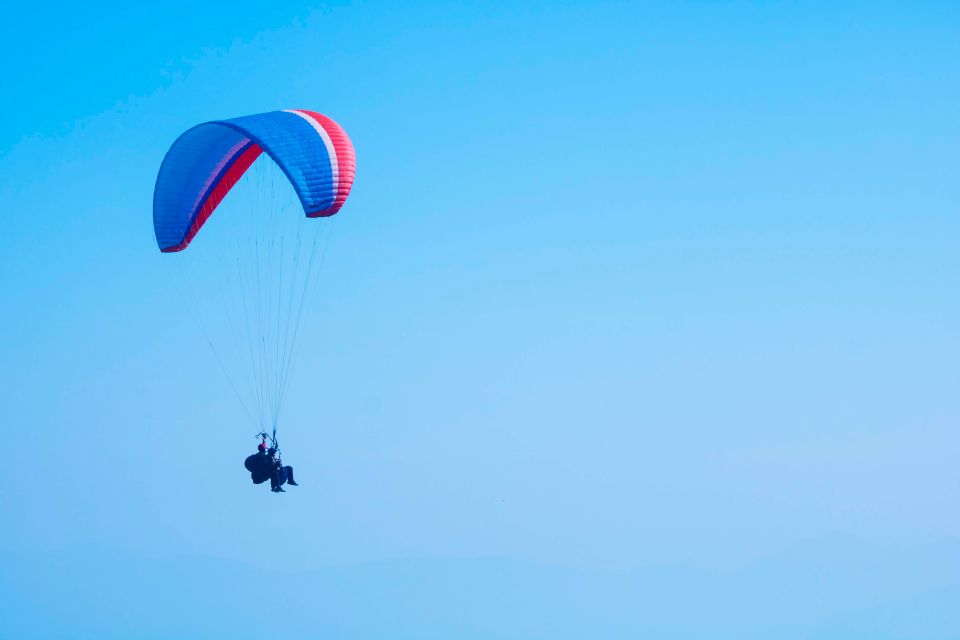
The safety approach here is practical: you get a safety briefing before you fly, and then your pilot runs the flight with you strapped in. You don’t need experience. This is tandem paragliding, so the pilot controls the canopy while you enjoy the ride.
I also like the way pilots explain what’s happening in plain language. In the past, English instruction and clear directions have been a standout for people, and names like Bharat show up in feedback as someone who keeps things calm and organized during the whole process. Another name you’ll hear from pilots in accounts is Raul, who is noted for checking in and flying smoothly.
If you’re worried about safety, focus on one thing: follow instructions during takeoff and landing. That’s where rider behavior matters most, and pilots are looking for cooperation, not perfection.
The trip includes insurance cover too, which adds peace of mind. It won’t remove every real-world risk, but it does mean the operator is planning for you like this is an actual aviation-style activity, not a casual stunt.
Photos and Paragliding Video: The Stuff You’ll Want Later
The best souvenir from this kind of flight is the one you don’t have to work for. You’ll get paragliding photos and a paragliding video included, so you can focus on experiencing the air instead of trying to handle a camera at takeoff.
Many rides are remembered for how well pilots capture moments during the flight. People note that pilots take lots of pictures and short clips, which makes sense: aerial angles are hard to replicate later, and the content is what turns your memory into something you can share.
One practical thought: bring the smallest bag you can manage. A bigger bag may not come with you to every stage right away, and it might be stored in the van. In at least one case, luggage got dropped later to the accommodation, but it still helps to pack like you’re going “light and quick.”
For clothing, a light jacket is a smart move. Even if Pokhara feels warm on the ground, temperatures can shift once you’re up in the airflow.


Price and Value: Is $86 Worth It?
At $86 per person, this is priced like a full-service adventure, not just a ticket for the activity. You’re not paying extra for pickup and drop-off from the Lakeside area, and you’re also getting insurance cover plus the photos and video.
That value adds up for three reasons:
- You save hassle: pickup and drop-off remove the logistics stress of getting to Sarangkot on time.
- You save effort: tandem flight means your experience doesn’t depend on physical skill or prior training.
- You save money later: aerial photo and video services are often add-ons in other adventure formats.
What’s not included is simple: food and drinks. Plan on eating separately, and consider whether you want to bring a small snack for the pre-flight wait.
If you’re comparing it to other Pokhara adventure activities, this one tends to deliver the “wow” factor fast. You’re trading hours of hiking for a short, high-impact experience with a view payoff.
Timing, Group Size, and Packing for an Easy Day
The total time is about 3 hours, which is an ideal length for fitting into a Pokhara itinerary without stealing your whole day. A key detail that helps the vibe: the group is limited to small groups of up to 9 participants. That usually means less waiting around for the whole crew.
Pickup happens from your hotel in the Lakeside area, and you return there after the activity. This is convenient if you’re staying near the lake promenade and want to keep evening plans simple.
Packing advice is where people quietly save themselves stress. Bring essentials only in a small bag. One practical tip: you generally don’t need to carry water for the flight itself, since there’s a cafe at the landing site where you can grab basics after you land.
Also, plan for clothing that works fast. Wear something comfortable for moving around before takeoff, then you’ll be glad you brought a light layer for the cooler air.
Finally, if your bag is larger than expected, it may not travel with you at every step. It might be left in the van and handled separately after the flight, so keep anything truly important on your person.
Best Months to Fly in Pokhara: When the Air Is Most Friendly
Paragliding is available year-round, which is great if your schedule is tight. But the best times tend to be September to November and March to May. That’s when flying conditions are usually more suitable.
If you’re booking for a specific week, I’d still keep flexibility in your mind. Weather can affect day-of timing for any flight, especially in mountainous areas, so choose dates where you can adapt your schedule.
In general, this is an activity that pairs well with a broader Pokhara plan: you get a big aerial view without needing a long trek, and you can still enjoy lakeside downtime the same day.
Who Should Book This Tandem Paragliding Flight?
This is for you if you want a thrilling Pokhara activity without training. It’s suitable for anyone aged 18 and above, and you do not need prior experience.
It’s also a strong fit if you like structure. You get safety instructions, and you’ll fly with a pilot by your side the whole time. People describe the experience as peaceful once airborne, which is a good sign if you’re not trying to “fight” your way through a sport.
Two practical considerations:
- If you weigh more than 95 kg, there’s an extra fee.
- If you get anxious right at takeoff, give yourself grace. Follow the pilot’s directions and remember the feeling changes quickly once you’re in the air.
If you want the “I did something unforgettable” story for Nepal but still want an afternoon that isn’t wrecked by exhaustion, this is a great candidate.
Should You Book This Pokhara Paragliding Adventure?
I’d book it if you’re chasing the big view-to-effort ratio. For $86, you’re getting a tandem flight from Sarangkot with included pickup and drop-off, insurance, plus photos and video that handle the souvenir part for you.
Don’t book it if you hate heights so much that you can’t follow simple instructions at takeoff. The ride is peaceful once airborne, but you still have to commit to the start.
If you’re deciding between this and a more hiking-heavy day, think about what you want to remember. This is one of the fastest ways to see Phewa Lake, forests, and the Himalayas from above, with a guide handling the technical work.
FAQ
How long is the paragliding experience?
The total experience runs for about 3 hours, with the flight itself lasting around 30 minutes.
Where do you get picked up and dropped off?
Pickup and drop-off are included from the Lakeside area. Your representative picks you up from your hotel and returns you there after the activity.
Do I need prior paragliding experience?
No. This is tandem paragliding, and there’s a briefing before takeoff. Your pilot controls the canopy while you enjoy the flight.
Is there a minimum age requirement?
Yes. The activity is suitable for participants aged 18 and above.
What’s included in the price?
You get pickup and drop-off, insurance cover, paragliding photos, and paragliding video.
Are food and drinks included?
No. Food and drinks are not included.
What’s the best time of year to go?
The best time to fly is typically September to November or March to May, when conditions are more suitable.
Is there a weight limit?
Guests weighing more than 95 kg are subject to an extra fee.
Is there cancellation flexibility?
There is free cancellation up to 24 hours in advance for a full refund.